Today I made…..Green Bean, Cannelli Bean and Bell Pepper Salad!

Green Bean, Cannellini Bean and Bell Pepper Salad

This was a simple and yummy recipe!   Especially satisfying and cool on a summer night when you eat it cold.    

 Green Bean, Cannellini Bean and Bell Pepper Salad

 1 red bell pepper, halved and seeded

1 yellow bell pepper, halved and seeded

3 tablespoons olive oil

1 pound green beans, trimmed

2 15- ounce cans of cannellini beans, rinsed and drained

2 tablespoons capers

2 anchovy fillets, finely chopped (optional and I opted out)

2 tablespoons red wine vinegar

Salt and pepper

 Rub bell pepper halves with 1 tablespoon olive oil.  Place on baking sheet in 400 F degree oven for 8-10 minutes turning once.  Remove from oven, place in a plastic bag and seal.  Let stand for 5 minutes and then remove and carefully peel.  (I did roast my peppers.  They are easy and delicious.  You could also used some canned roasted peppers though.)

 In a large pot, bring water to a boil.  Add green beans.  Cook, covered, for 10 to 15 minutes, until crisp-tender.  Drain.  Cool in ice water.  Drain.  (I don’t think you could use canned beans for this, but you probably could substitute frozen.)

 In a large boawl, toss peppers, green beans, cannellini beans, capers and anchovies (if using).  In a small bowl, whisk together vinegar and the remaining oil.  Season to tast with salt and pepper.  Toss vegetables with dressing and serve. 

 This is good hot or cold!

 Happy Creating!

 Allyoop

Today I made…..an upcylced mini tank dress!

Goodwill Dress Post Hack

Goodwill Dress Before the Hack

One of my great shopping finds!  I liked this print so much, but the animals on the bottom……!   It wasn’t cutting it for me, so I cut it!!

 
I wanted to keep as much length as possible since I’m not one to wear skirts that are too short.  I cut the bottom panel off about 1 inch into the print.  Then I pressed it right along the top edge of that print panel; folded the bottom edge up and ran a quick straight stitch all the way around.  There was no need for a slit or anything, so it was all good!
 
I plan to wear the dress with some black tights and black ballerina flats!  Check out the end result.
 
Happy Creating!
 
Allyoop                                                     
Today I made…..Harvey Wallbanger Cake!!

 
Harvey Wallbanger Cake-Delish!
 
Although I haven’t posted in a while (months in fact!), I have been busy making stuff.  I have taken a lot of pictures, so I will try to get some things posted densely here in the next little while!  So much has been going on for me, I went part time at work and am building a business from scratch.  Believe me, this takes creativity! 
 
One of the things I resolved to do this year is to get back to cooking a bit.  I used to cook a lot and then when I worked so many hours for so many years, I really stopped, except for rare occasions!  So, I have been cooking and enjoying it.  I will share some of that here with you all.
 
I collect  recipes and I’m not sure where I got this one from, but it made a yummy citrus cake that everyone liked a lot.
 
Harvey Wallbanger Cake
 
1 pkg Orange Supreme cake mix (Duncan Hines)
1 (5 oz. box) vanilla instant pudding
1/4 cup vegetable oil
4 eggs
3/4 cup orange juice
1/4 cup vodka
1/4 cup Galliano
 
Mix all ingredients together.  Pour into well greased and floured 10 inch tube pan.  Bake at 350 F for 45 to 55 minutes.  Allow to cool for 15 minutes, then remove from pan.
 
Drizzle:
 
1 cup powdered sugar
1/2 teaspoon vodka
1/2 teaspoon orange juice
1/2 teaspoon Galliano
 
Blend ingredients together until smooth.  Drizzle over cake when cooled. 
 

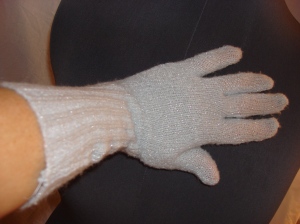
Today….I made some upcycled gloves!

These turned out so cute, I will probably have to make a couple more pairs.  These gloves started out life as a sweater which was just not flattering to me.  I needed some gloves for the football game last week and so I just decided to hack the sweater up!  I had to go back after I wore them and shorten the fingers and stitch up a couple of places that broke open.  I ended up going around the seams with a very narrow zigzag stitch.

I do have a pattern for gloves which have a gusset between all the fingers.  I have not had the guts to tackle them yet, but these I just traced around my fingers, cut and then stitched them up!  If I did this again, I would not spread my fingers during the tracing.  I would also use the sleeves as the bands around the wrists vs. the bottom of the sweater.   I think this would eliminate one of the side seams for me.

But these also sparkle, which is good!!

Happy Creating!

Today….I upcycled a T shirt.

Finished product!


I am upcycling again!  This is a T-shirt which I won at a football game early in the season this year.  It was size XL and I am more like a medium!  Besides that I rarely wear T-shirts out, but I do sleep in them.  My preference is more fitted ones though vs. ones I can swim in!   At any rate, our high school has a really good team this year!  (Currently, we are at 5 and 2!).  Go Raiders!  So…..I wanted a shirt to wear and show my team spirit.  My DD is in the band, so I am spending many hours cheering for the band and the team. 

I cut the top of the sleeve straight from the edge of the sleeve to the shoulder seam.  this created a little flutter effect. 

I also cut the neck band out and scooped the neck and the back as far as I could without cutting the motif.  No finish on the edges, just left them raw.  I also had another T-shirt that has a rounded bottom edge that I really like, so I copied that too.  I did this on my dress form, so I just fiddled with it to make it feminine and fitted.  I cut two slits in the back to tie a ribbon through. 

I tied it up with ribbons in all the places that seemed like it needed it.  the picture shows navy ribbon, but I purchased some maroon ribbon later to make it more congruent with the school colors. 

The T-shirt is really cute on, lots of compliments.  I wear a black tank underneath and it kind of slides off my shoulders flashdance style.  (for those that remember those days….actually that stuff is stylish again! I do hope bike shorts and parachute pants DO NOT come back in though.)

I have quite a few things to post, so I’ll try to get with it a bit more.

Happy Creating!

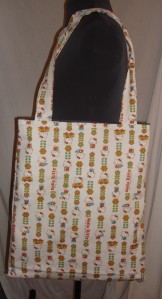
Today…..I made a Hello Kitty bag for my niece.

Hello Kitty Bag
Hello Kitty up close!
Reversible Denim and Hello Kitty Tote
I actually made two bags.  The plain one was for one of my DD’s friends for Christmas.  The denim and Hello Kitty bag was for my niece who LOVES Hello Kitty!
 I did not use a pattern for these totes, but I made my nieces reversible and I enclosed all the seams in both just to make them more durable and finished in appearance.  Not that the girls care, but still!
The bigger story of the bags is that I bought the Hello Kitty fabric in Japan.  My family travelled there during summer of 2009 and had a wonderful time.  If you ever get to go, make sure you shop at Fabric Town.  Take cash, no credit cards and be prepared to be OVERWHELMED with fabric shopping goodness!
Sign to Fabric Town
Happy Creating!!

Today, I made an upcycled top.

snazzy new top, upcycled from a ho hum dress

Recently have been very inspired by the site, A New Dress Every Day:  http://www.newdressaday.com/  This clever girl is making a new clothing item every day for a year.  Some amazing transformations occur at her hands! 

So….taking again my love of thrift shopping and sewing, I found a dress which I simply whacked off (without even a hem!) and added a wide black belt. 

Wore it to work yesterday and got a lot of compliments! 

This is how it started life, not too outstanding:

Dress waiting to be upcycled to a top

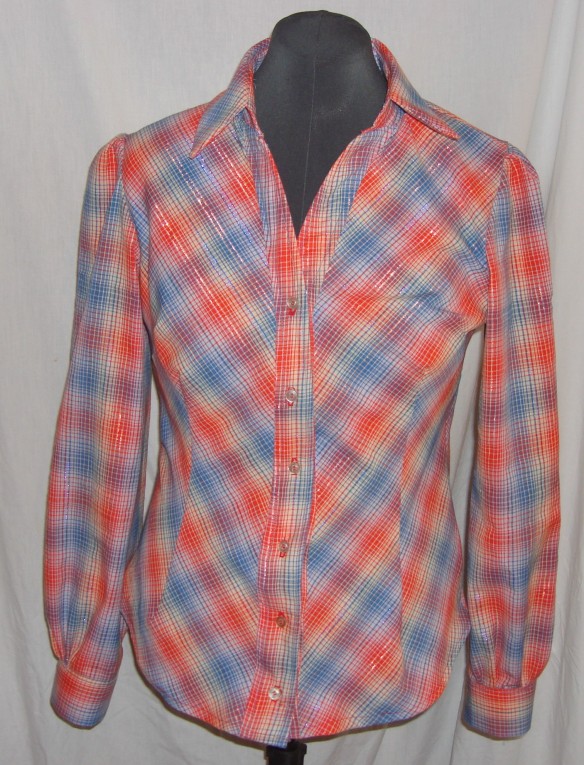
Today, I made a plaid shirt for the fall…..


I have been wanting one of these plaid shirts for the fall.  Finally found some colorful fabric to use at JoAnn’s last week.  I used McCall’s pattern M5929 but I decided against the ruffle.  I had made a top from this pattern a couple of weeks ago, but I didn’t care for the fabric once I had it made.  Very dull.  The pattern itself though was very easy and fit really well.  The back view:

It is fitted with darts and tucks in front and back which make the fit very flattering and still feminine.

Of course, the fabric is shot with metallic threads which won me over even more than the color!  A girl has to love sparkle!!  close up shot:

So, fast and fun project today.  I cut the fabric out on Friday night before my DD’s football game and did the darts yesterday.  All the rest was sewn up today and besides sewing one facing on too low, I didn’t run into any “work arounds”.  Read my review here:  http://sewing.patternreview.com/cgi-bin/readreview.pl?readreview=1&reviewnum=55727

Happy Creating!

Allyoop

Today, I made an upcycled skirt.

Wow, it has been nearly a year since I made a post to my blog.  Crazy!  I definitely have continued to create.  Most of the time, I have even taken pictures, just haven’t made it to the blog.

I made this skirt from a shower curtain that I picked up at a thrift store.  I thought it was beautiful fabric; I’m a sucker for SHINY!

My picture looks shorter and fatter than the skirt actually is.  (kind of like pictures of me!)  I had to turn the picture and I could not figure out how to stretch it back to an accurate view.  Maybe someone could help me with that?

I made this skirt and another out of pillow shams on the same day using Simplicity 2452.  This pattern is a super simple tailored skirt with a back kick pleat, side zip and a narrow waistband.  Really quick and easy.  The lines and proportions are great for such an ornate fabric.

Recycling/Upcycling is definitely the passion of the moment to me.  It pairs my LOVE of thrift store shopping (such a treasure hunt!) with sewing.  The result is stacks of things in my sewing room to re-create. 

There may never be enough time!

Happy Creating!

Today….I made a fabric box

I made this cute box for my older daughter who is crazy for houndstooth.  I used fabric from an old skirt to cover it.  I did use a pattern, Simplicity 4320.  You can find it here:  http://www.simplicity.com/Search.aspx?SearchTerm=4320&x=42&y=9

This wouldn’t be too hard to make without a pattern though if you use basic construction principles.  The pattern has 10 styles/sizes though, which makes it very versatile. 

The finished piece is larger than I thought and I think it turned out pretty snazzy!  I definitely will make some of these coming into the holidays. 

Happy Creating!